Developer Guide Best practice when coding with AICS
SonarCloud HowTo
Prerequisites
Sign up on AICS on SonarCloud with your Github account.
Import your project into sonar
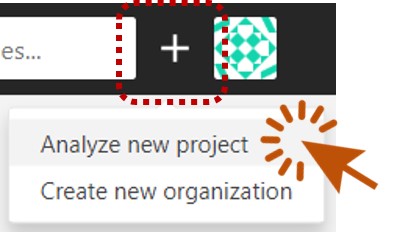
Click +, then select Analyze new project.
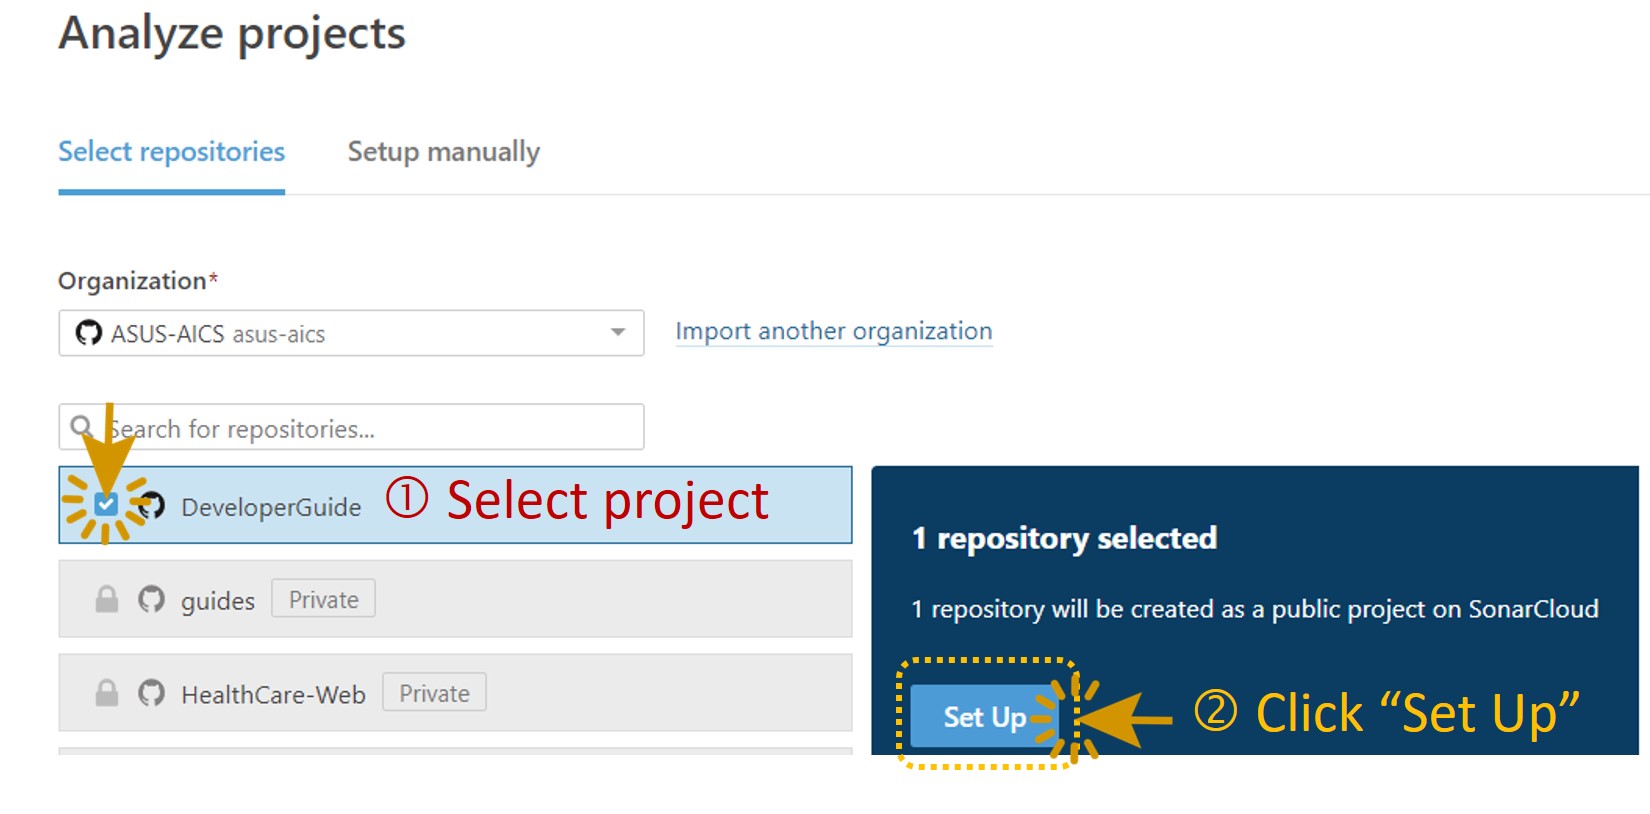
Select your project name and click “Set Up” button.
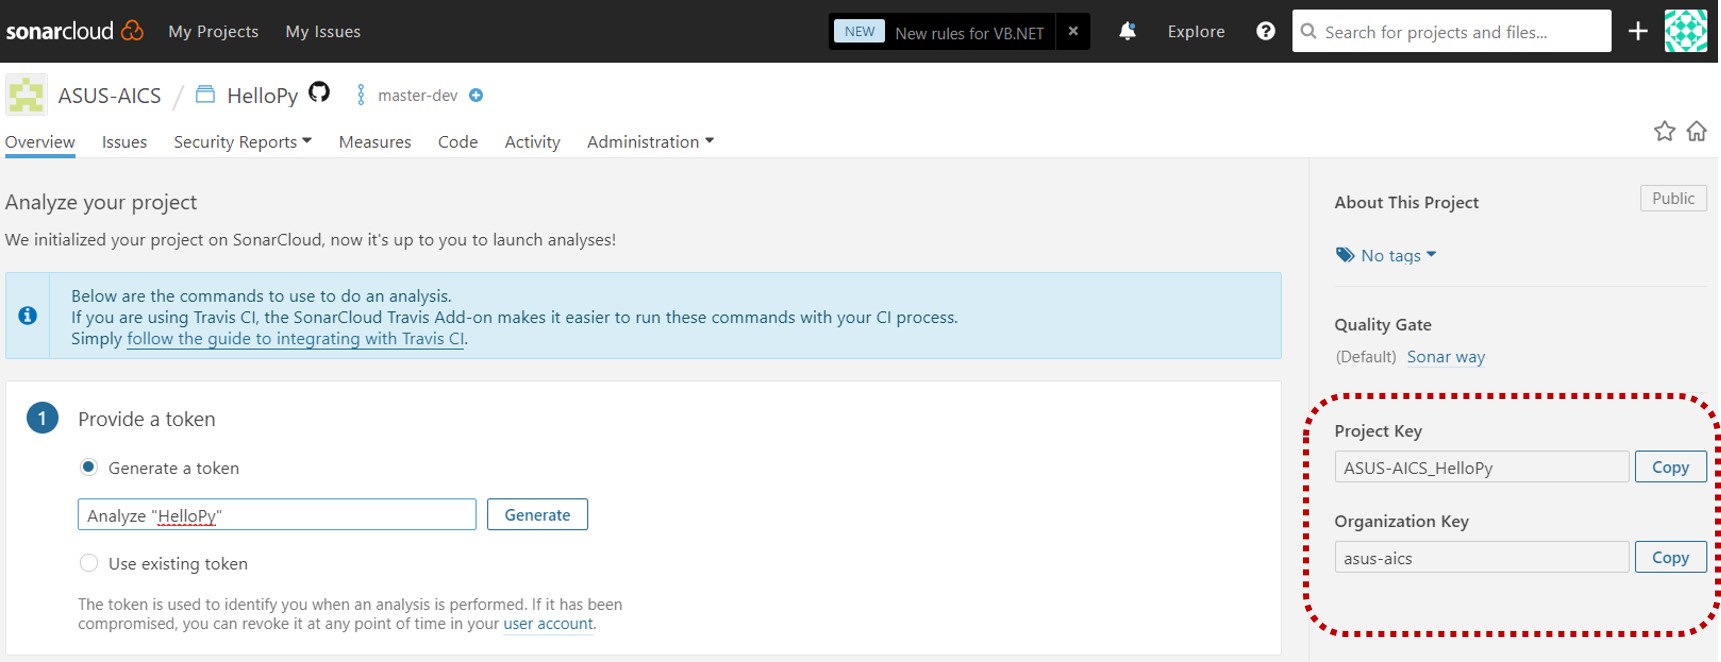
This is the screen when you first enter the newly added project, copy the organization and project key for later use.
Create your own sonar token
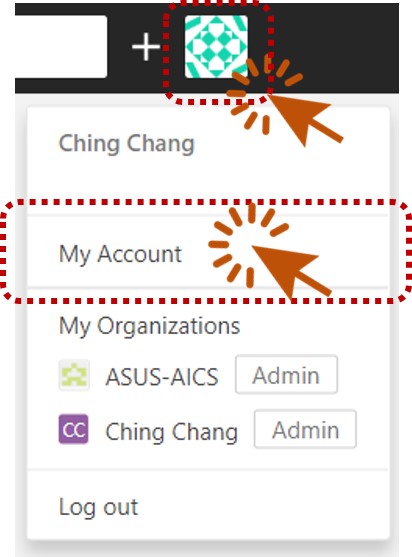
Go to My Account, or click this:
Select Security tab. Generate a new token:
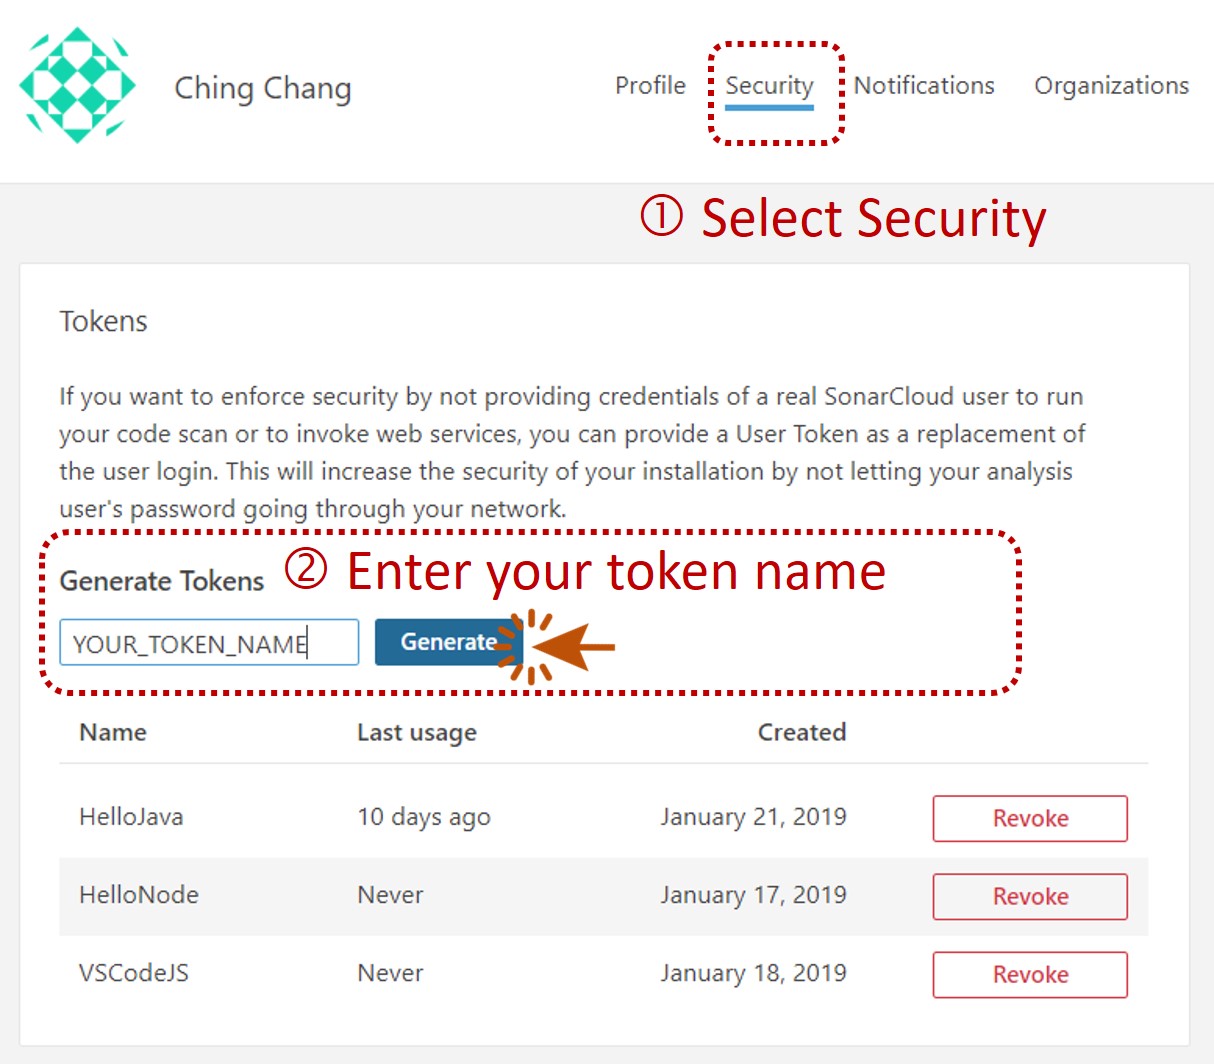
Copy the token. Make sure you copy it now, you won’t be able to see it again!
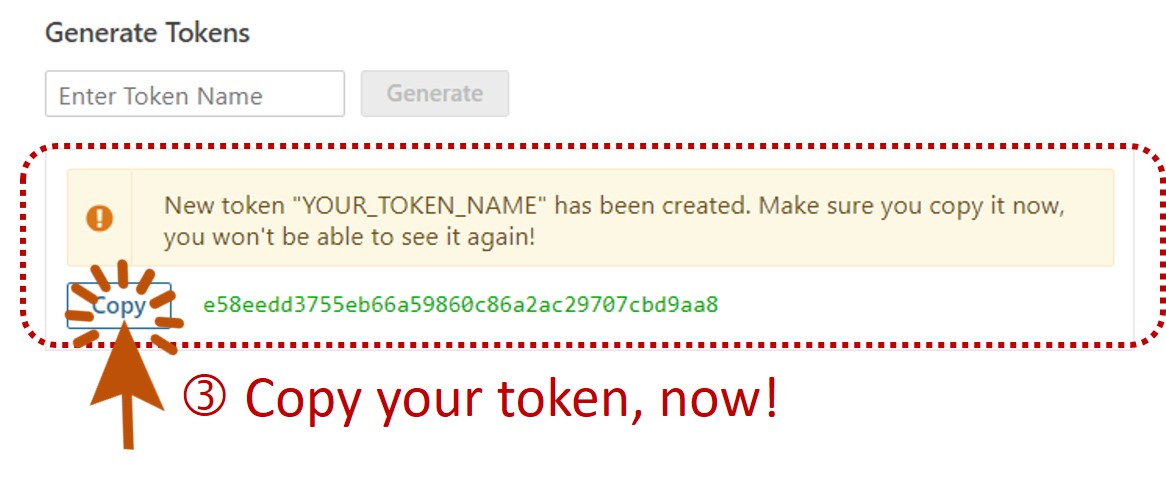
When you want to run sonar analysis locally or through Travis, you can use this token to represent yourself. Also, this token will be used in the next section.
Add sonar token to Travis-ci
To run sonar cloud with Travis-ci, you have to (1) add the copied token via web UI on
ASUS AICS on travis, and (2) add config to .travis.yml.
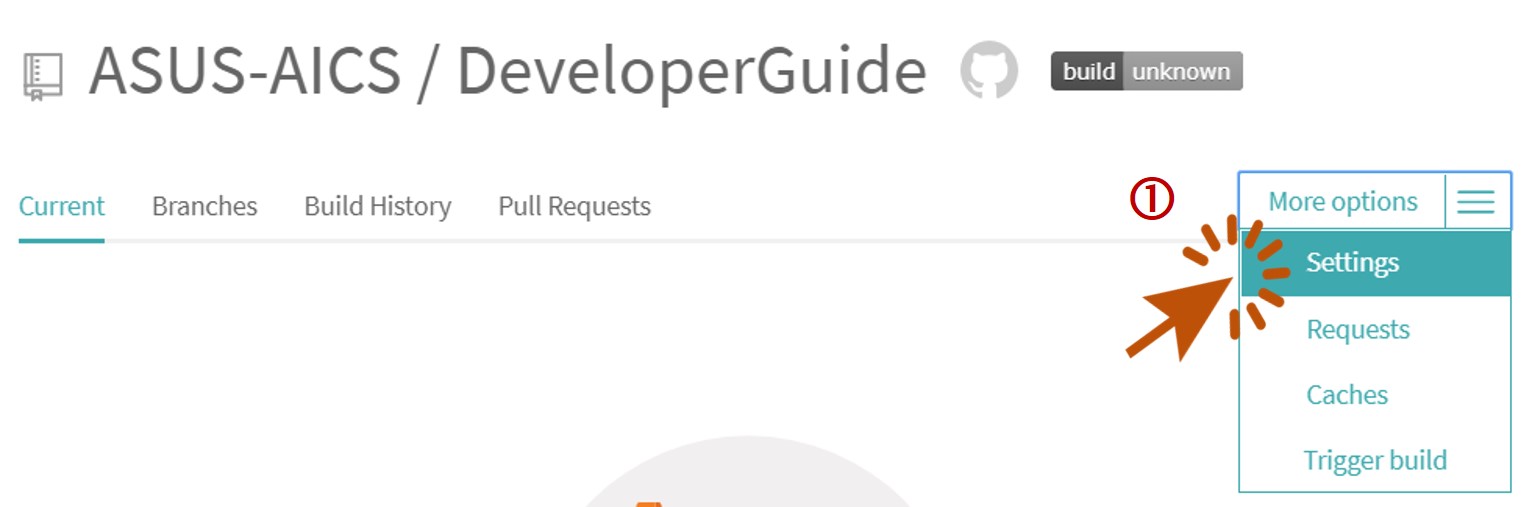
Create environment variables on Travis with web UI
Go to ASUS AICS on travis. Select your project, and click More options > Settings
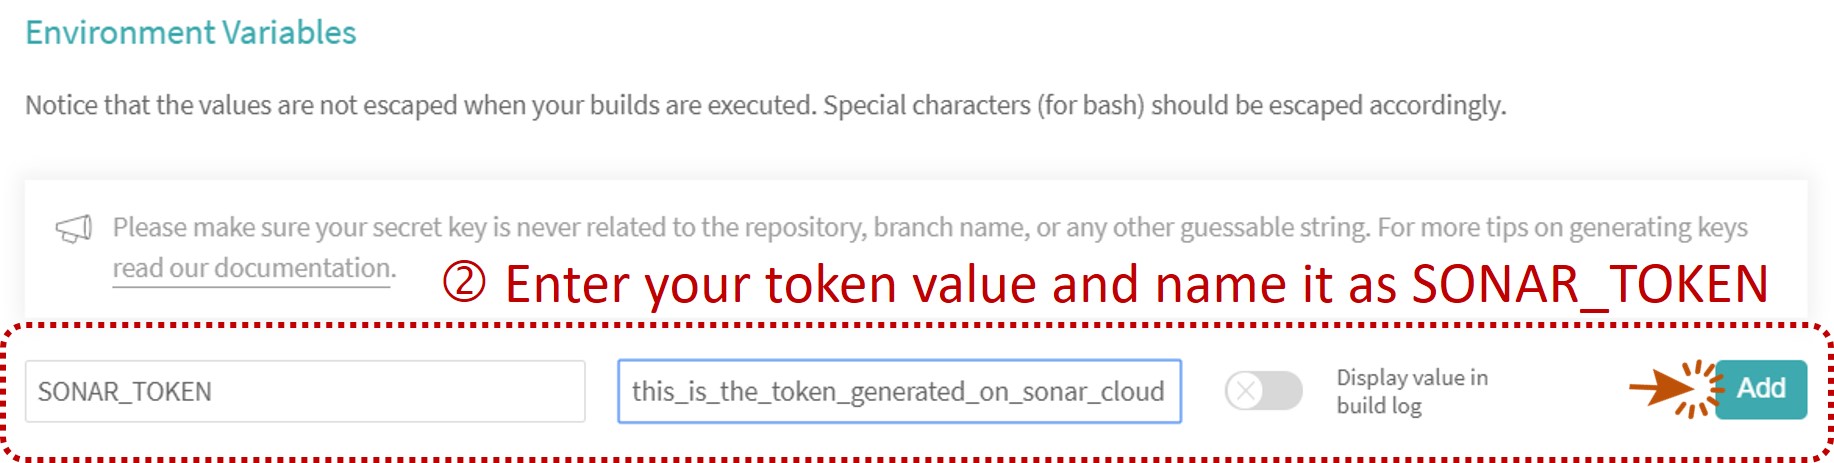
We have to add two variables:
- Add the project key you copied in step - Import your project into sonar and name is it as SONAR_PROJECT_KEY.
- Add the token value you generate in step - Create your own sonar token, and name is it as SONAR_TOKEN.
Do not display the value in build log!
Edit .travis.yml
First, edit travis’ config file .travis.yml:
-
sonarcloud addons:
addons: sonarcloud: organization: "asus-aics" token: secure: $SONAR_TOKEN -
Add these codes snippet in your jobs’ stage:
 # Java .travis.yml sample
 jobs:
   include:
     - stage: "Unit Tests & SonarCloud Analysis"
       script:
         - gradle jacocoTestReport
         - gradle sonarqube -Dsonar.login=$SONAR_TOKEN -Dsonar.projectKey=$SONAR_PROJECT_KEY
# Node.js .travis.yml sample jobs: include: - stage: "Run Tests & SonarCloud Analysis" script: - npm test - sonar-scanner -Dsonar.projectKey=$SONAR_PROJECT_KEY
How to trigger SonarCloud analysis
- Make sure you have added the
.travis.ymlfile to git, commit and push. - Make sure you have configured related properties described in the next section - Basic config samples
- Whenever you commit and push to the repository, this will trigger a Travis CI build and launch the analysis inside your existing CI scripts.
- All done. Your source code will be sent to SonarCloud and in few seconds you can check the result on AICS on SonarCloud.
If you want to run a local testing, use command:
gradle sonarqube -Dsonar.login=<your_own_token>
For IDE lint extension support, see SonarLint for more detail.
Basic config samples
Here we provide Java and Node.js for your reference. For more examples in the other coding languages, check it on SonarCloud examples.
Java with gradle build
Edit your build.gradle and gradle.properties files.
build.gradle
- Apply
org.sonarqubeplugin in build.gradle file. This plugin can activate the static code analysis through your code stack. Also, applyjacocoplugin to calculate code coverage report for you whenever you run unit-test jobs.plugins { // Apply the java plugin to add support for Java id 'java' // Gradle plugin to help analyzing projects with SonarQube id "org.sonarqube" version "2.7" // Apply the application plugin to add support for building an application id 'application' // Generate code coverage report id 'jacoco' } -
Add a jacoco test report job to generate the code coverage report.
 jacocoTestReport {
     // Forcing the execution of 'test' before the execution of 'jacocoTestReport'
     dependsOn test
 }
To test generating report locally, run command: gradle jacocoTestReport
Usually, the test report path will be generated at build/jacoco/test.exec.
Checkout HelloJava/build.gradle for full detail.
gradle.properties
Fill in the coverage report path in the last step.
systemProp.sonar.host.url=https://sonarcloud.io
systemProp.sonar.organization=<replace_your_organization_key>
systemProp.sonar.projectKey=<replace_your_project_key>
systemProp.sonar.jacoco.reportPaths=<replace_your_test_report_path>
Node.js
-
Remember to edit your .travis.yml file and make sure you provide the corresponding environment variables in your Travis-ci.com project settings page like we mentioned earlier.
-
If you want to get the test coverage information. Try Istanbul With Mocha. Add “report” command to your package.json scripts section.
{ "scripts": { "test": "mocha test/*test.js --exit", "report": "nyc --reporter=lcov --reporter=text-lcov npm test" } } -
SonarCloud can parse the lcov file generated by Istanbul and assign lcov file path in your sonar-project.properties file.
sonar-project.properties
sonar.projectName=HelloNode
sonar.projectVersion=1.0
sonar.language=js
sonar.sources=src
sonar.tests=test
sonar.exclusions=node_modules/**

# Properties specific to language plugins:
# - For code coverage reports
sonar.javascript.lcov.reportPaths=coverage/lcov.info