Developer Guide Best practice when coding with AICS
Azure Build Pipeline HowTo
Prerequisites
To create Azure build pipeline, make sure you are a team member of AicsProjects organization in Azure DevOps. Also, you need a Git repository in GitHub.
To get started with Azure build pipeline
- Go to Azure DevOps and sign in with SSO.
- Go to Pipelines and click “New pipeline”
- Click “Use the classic editor to create a pipeline without YAML”
- Select GitHub and your project Repository/default branch(master)
- Select start with an “Empty job” and add build tasks to the pipeline
- Click “Save & queue” and wait to see if your build passes or fails.
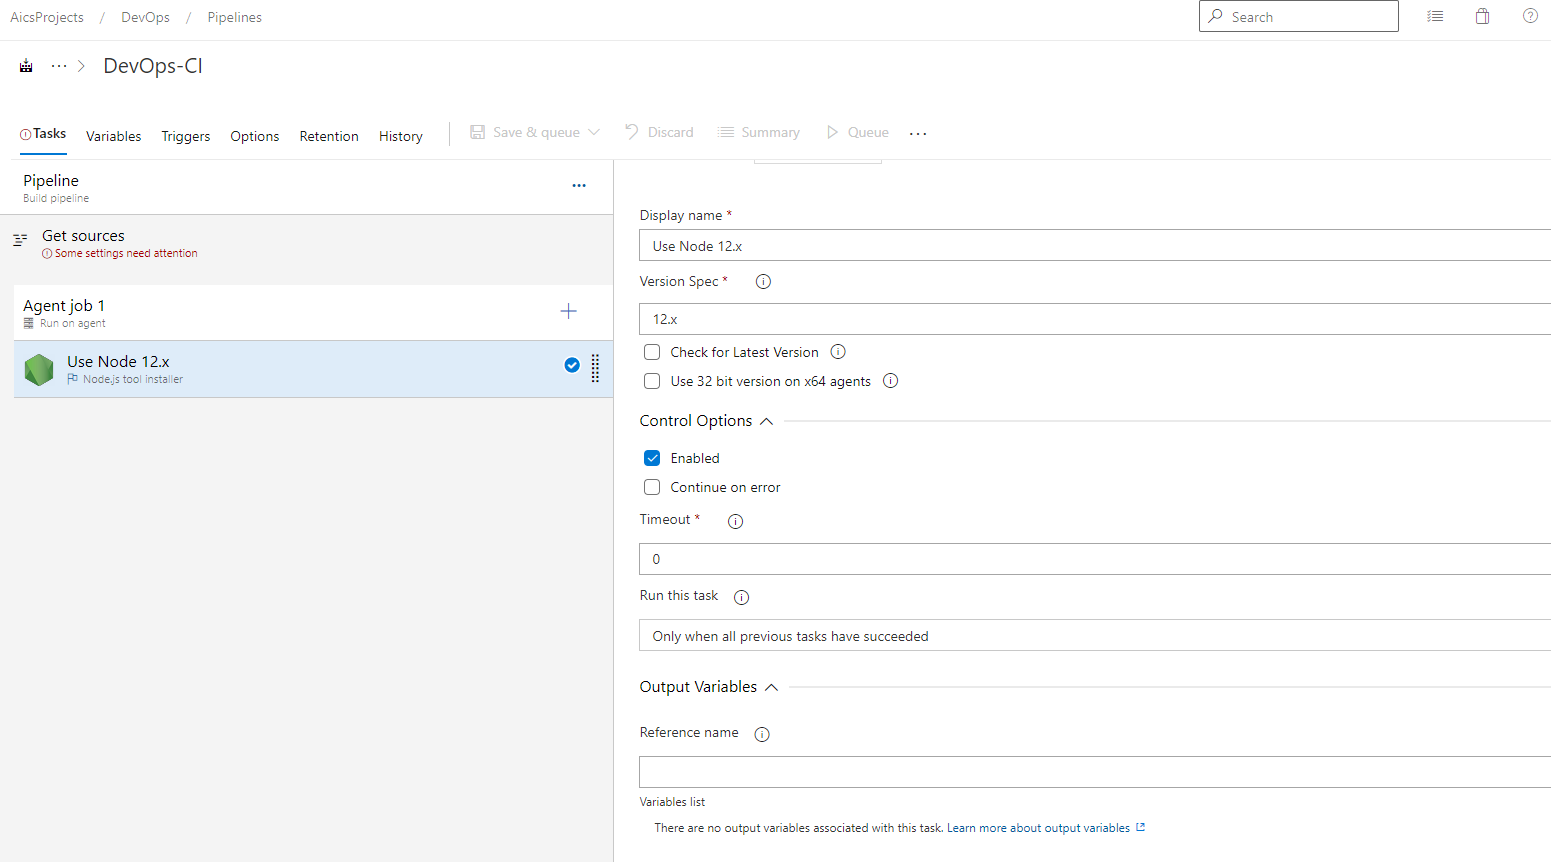
Node.js project sample
-
Add Node.js tool installer
-
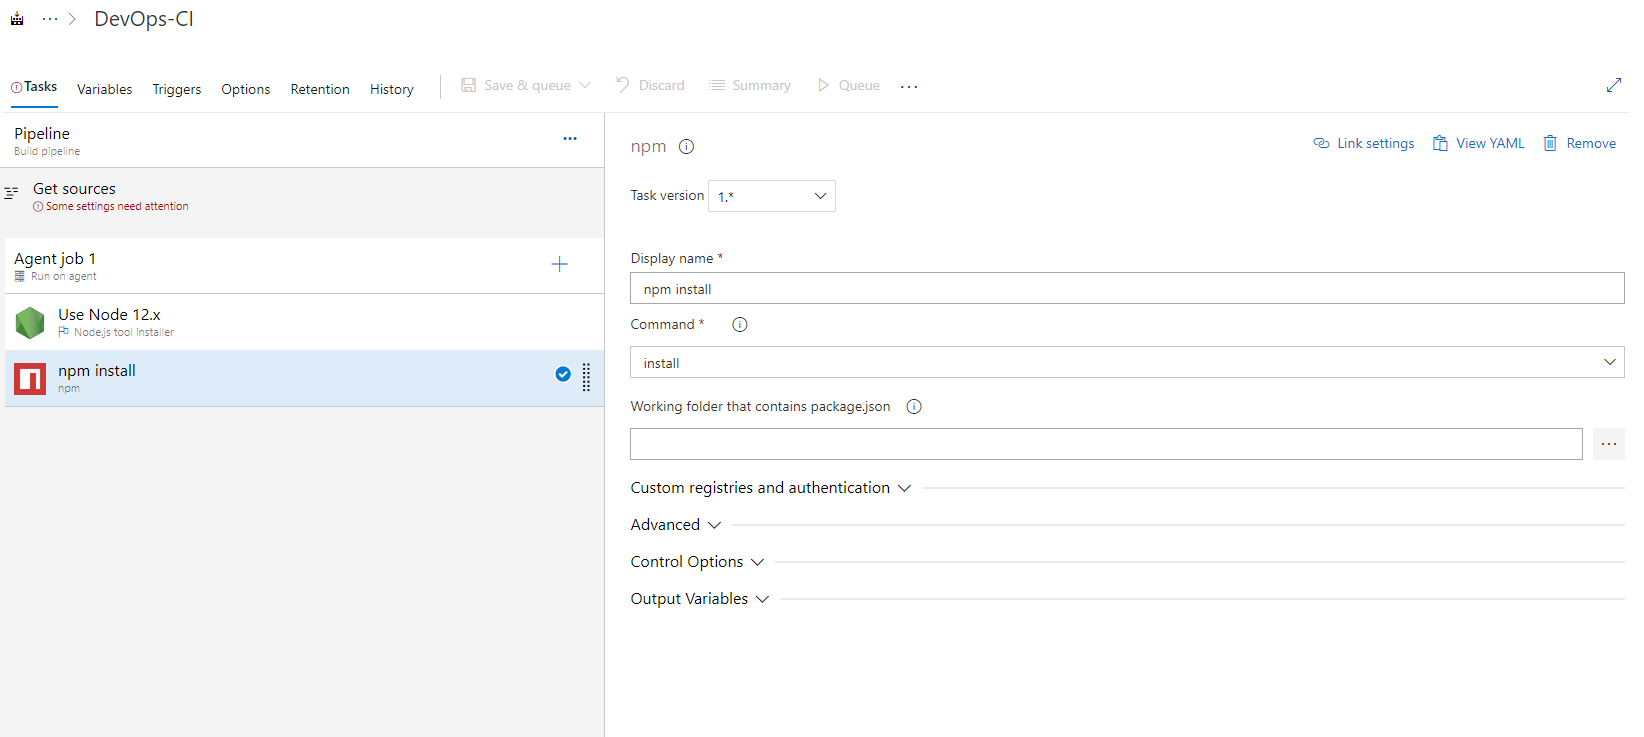
Add npm task for npm install
-
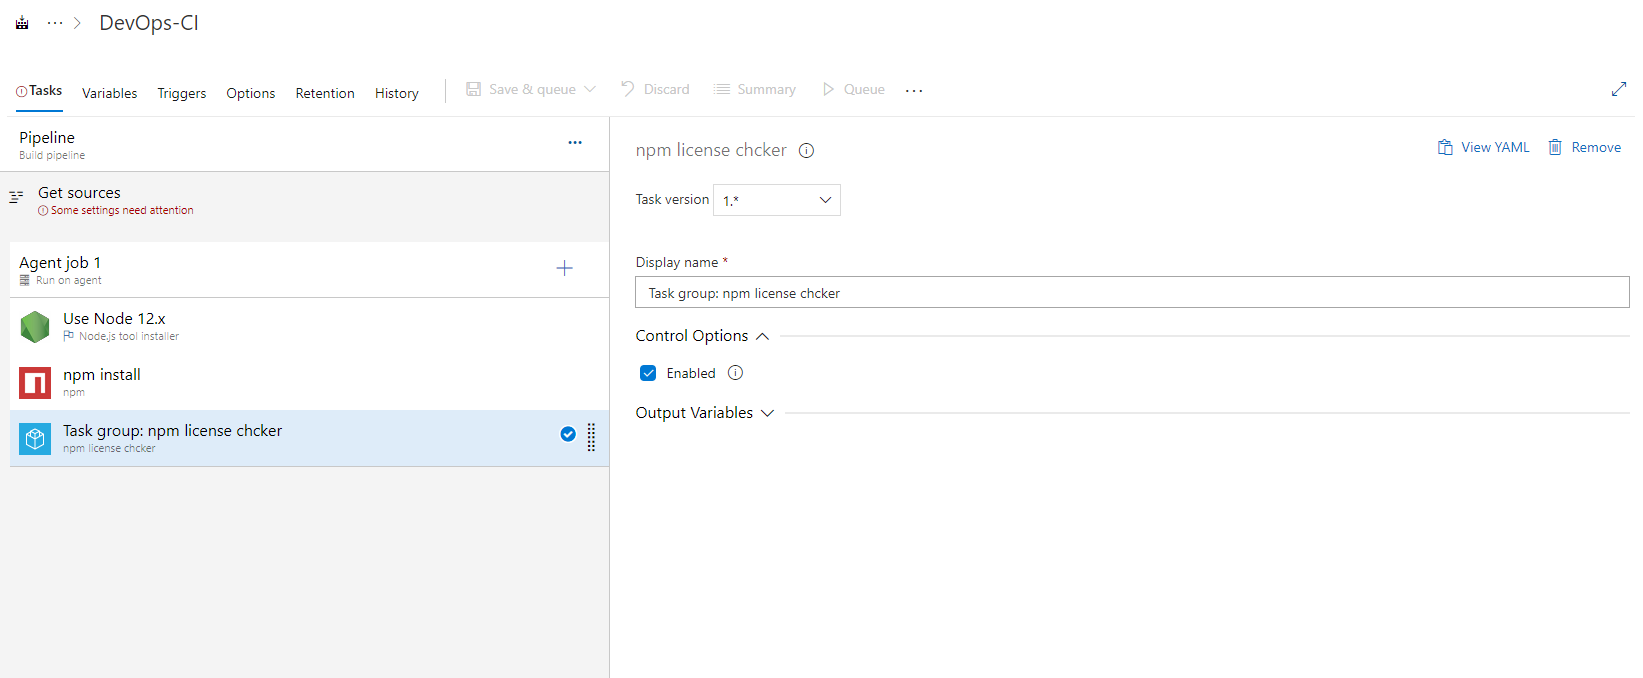
Add npm license checker to summarize license your project use
-
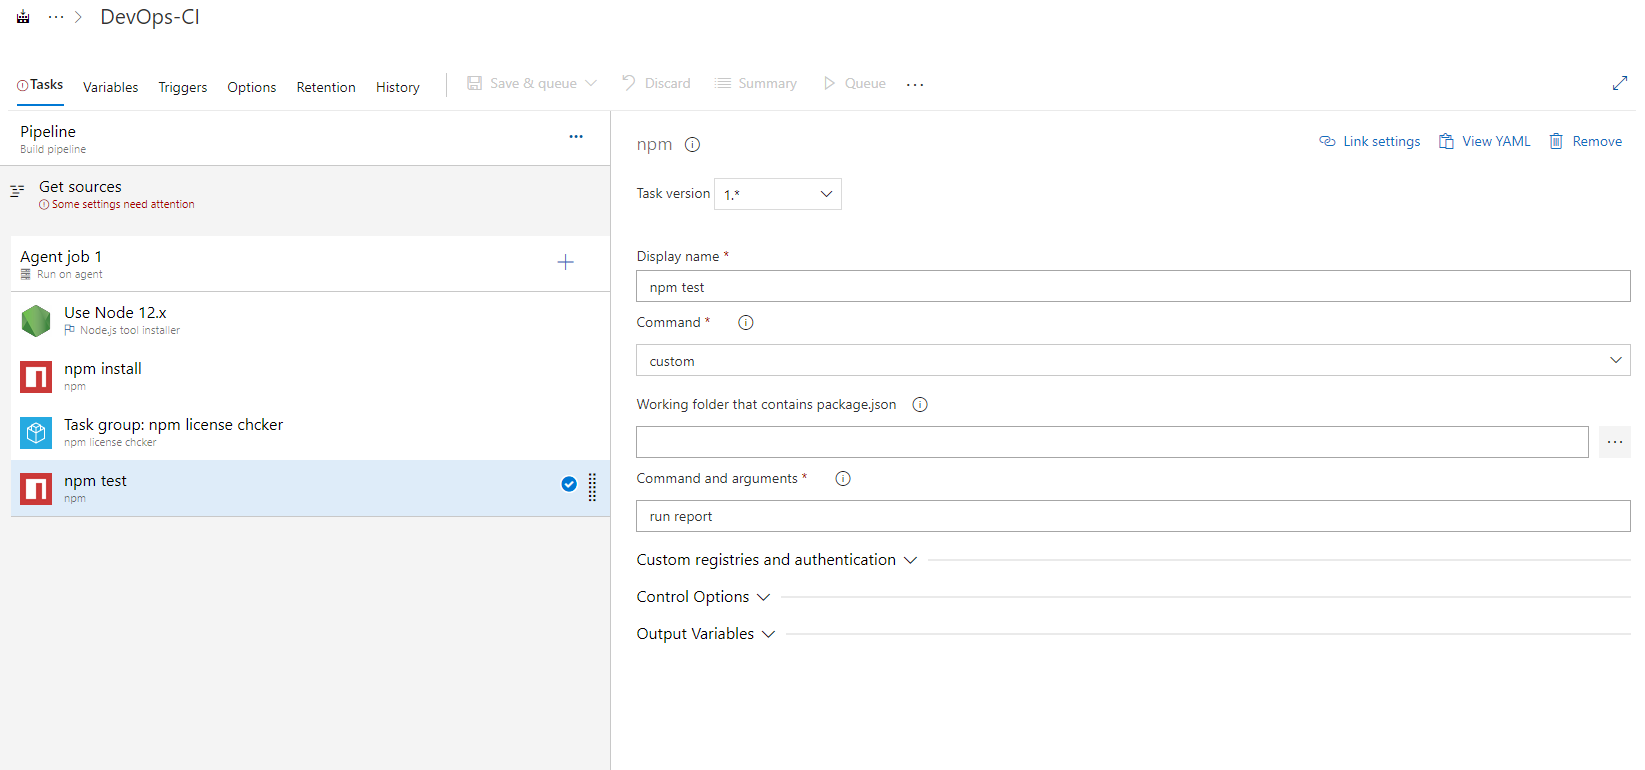
Add npm task for npm test
Select custom command and arguments
-
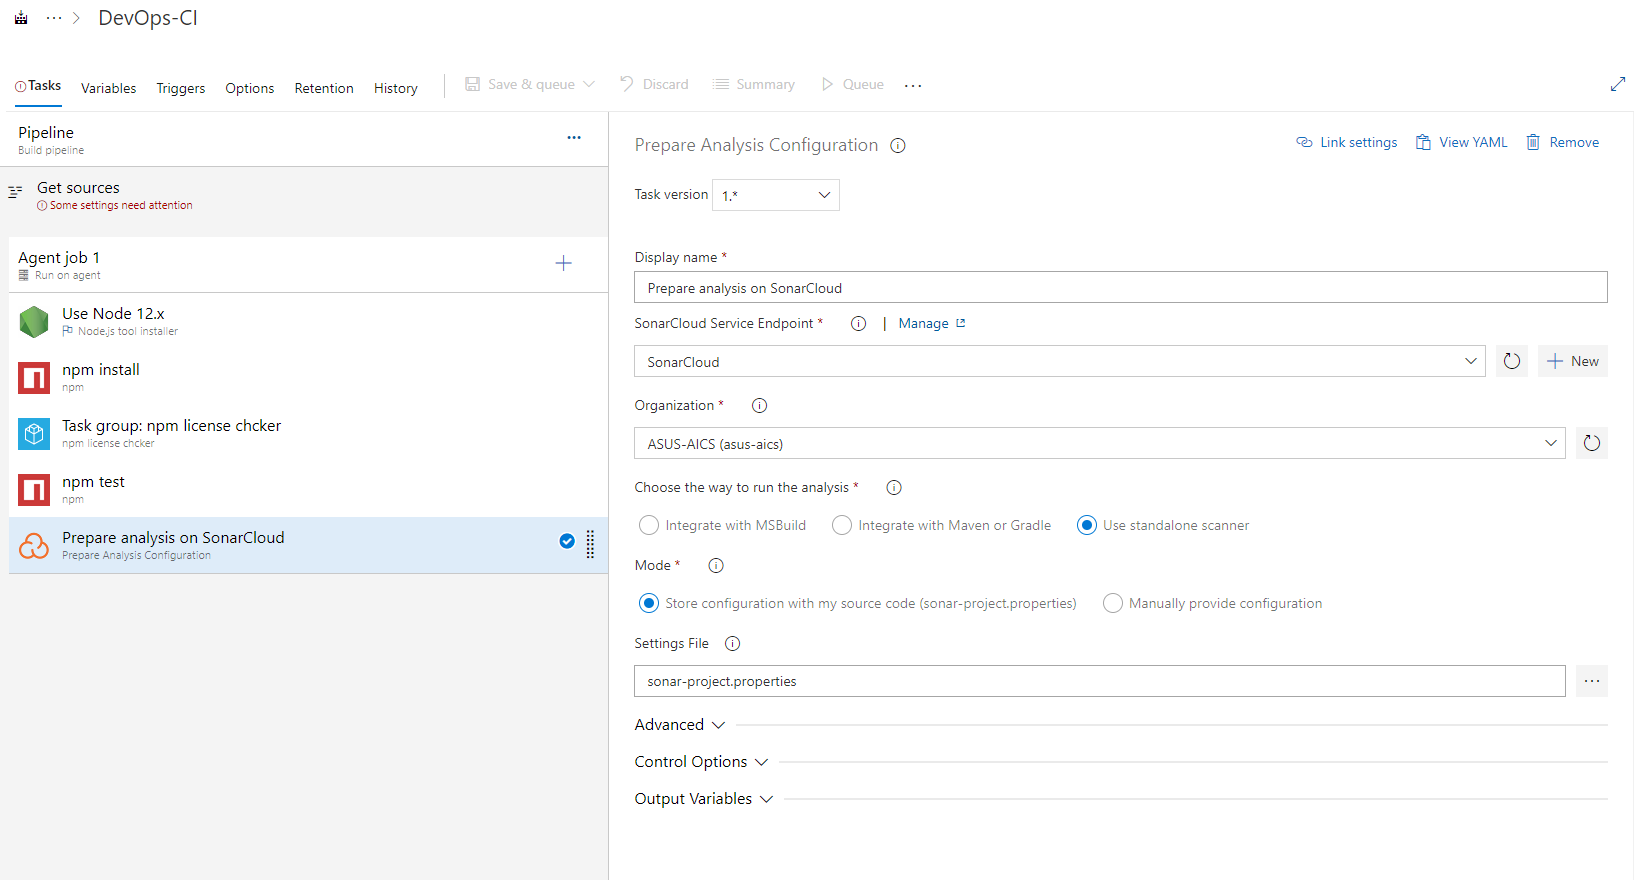
Add task to prepare analysis on SonarCloud.
Select the SonarCloud endpoint for your project.
If there’s no endpoint in the option, you should create one. To create one, go to your Project Settings, then Service Connections and create a new SonarCloud Service Endpoint, you will have to enter your SonarCloud account token.Choose standalone scanner which means you need a sonar-project.properties file in your repository. See SonarCloud HowTo for detail.
-
Add task to run SonarCloud
-
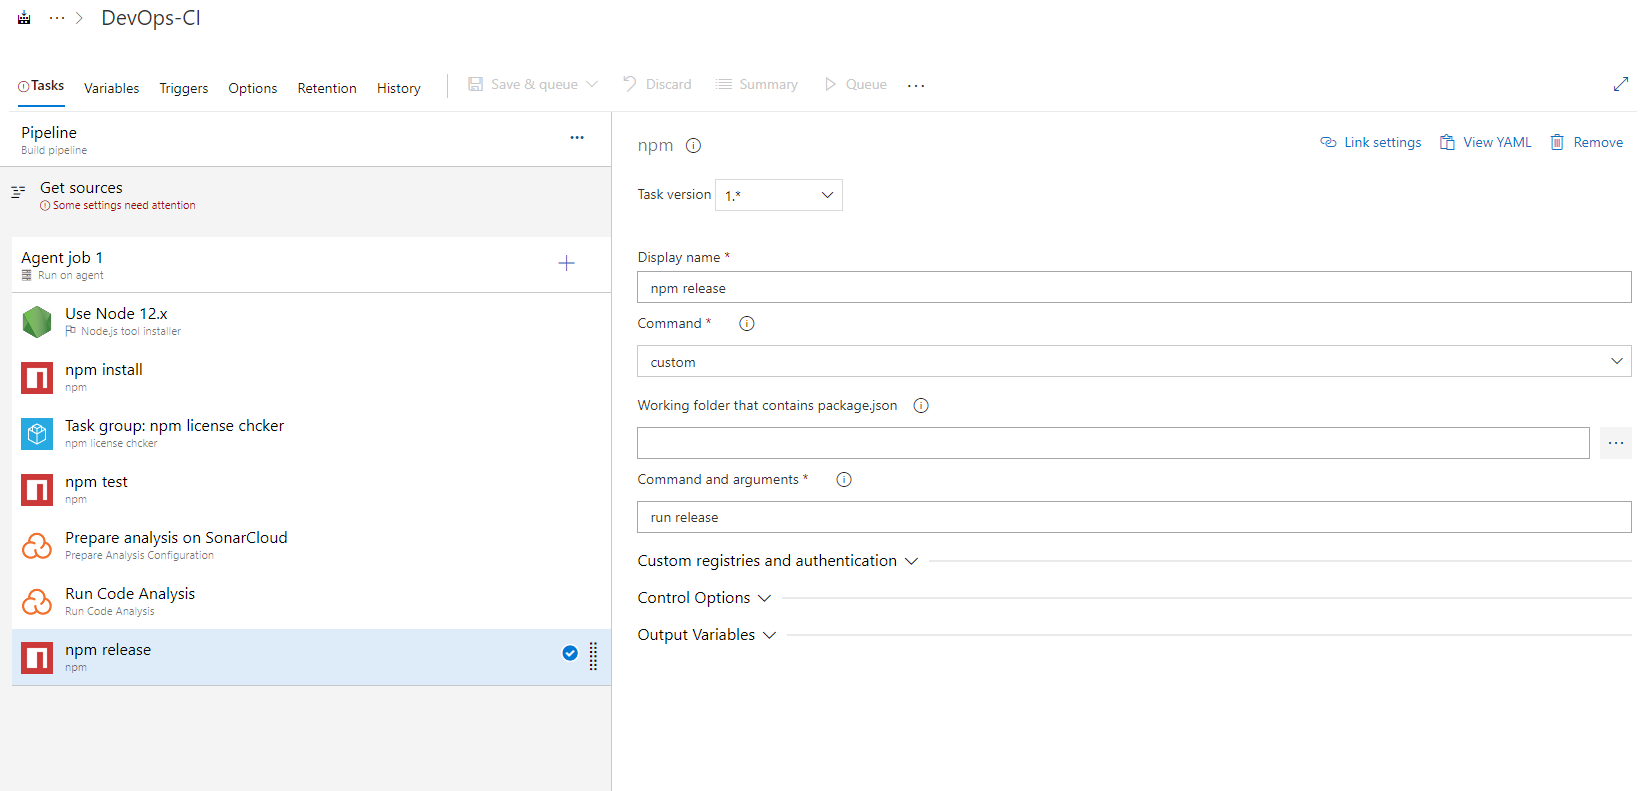
Add npm task for npm release
-
Add a task to archive file

-
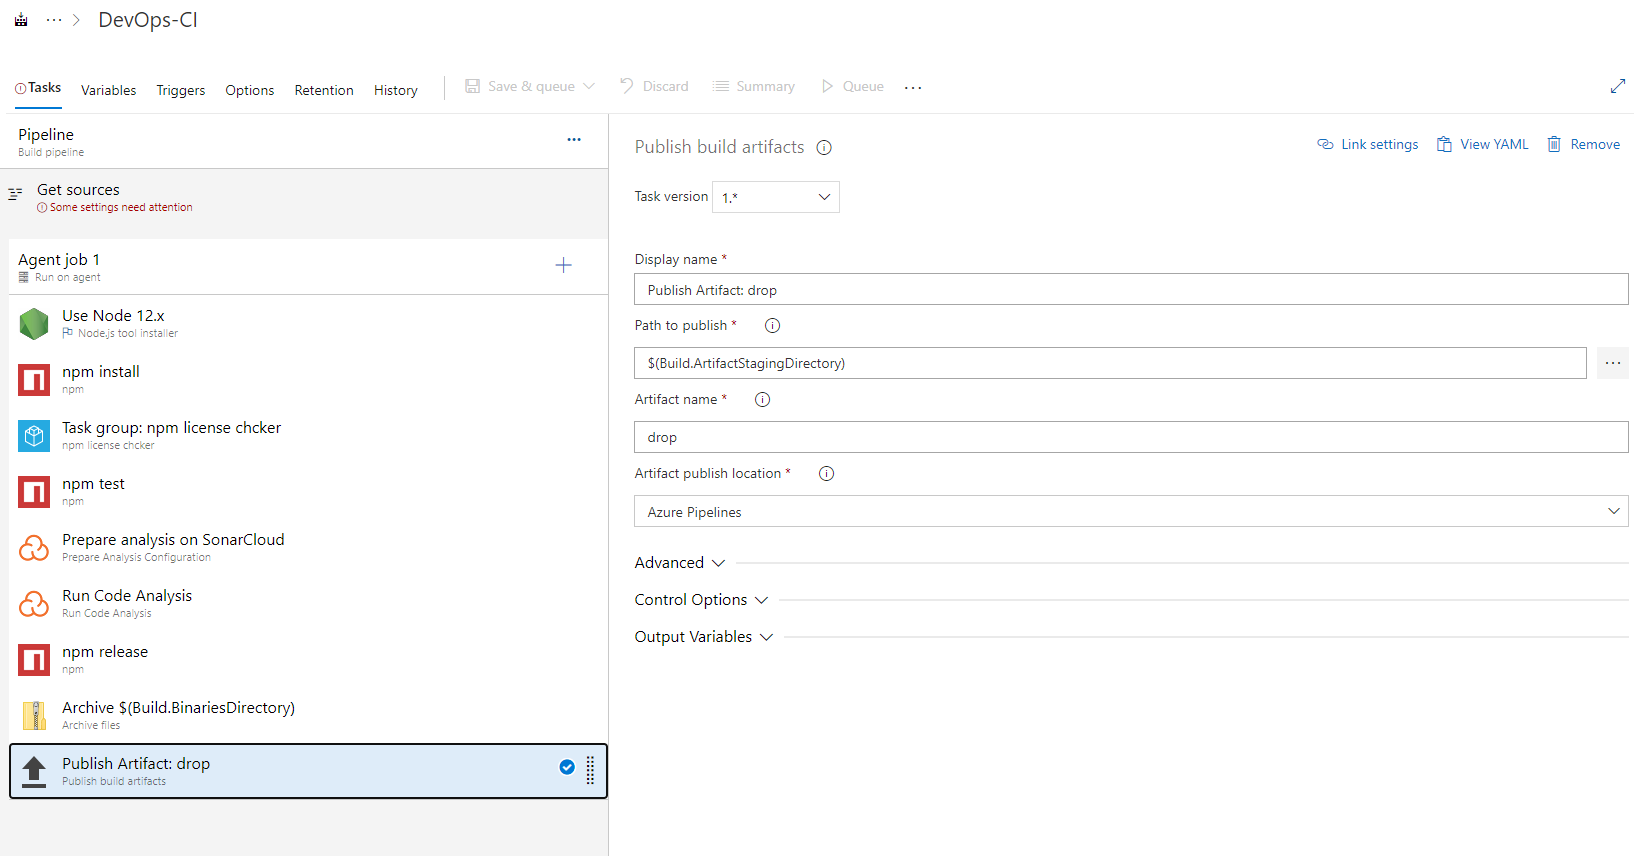
Add a task to publish artifact
-
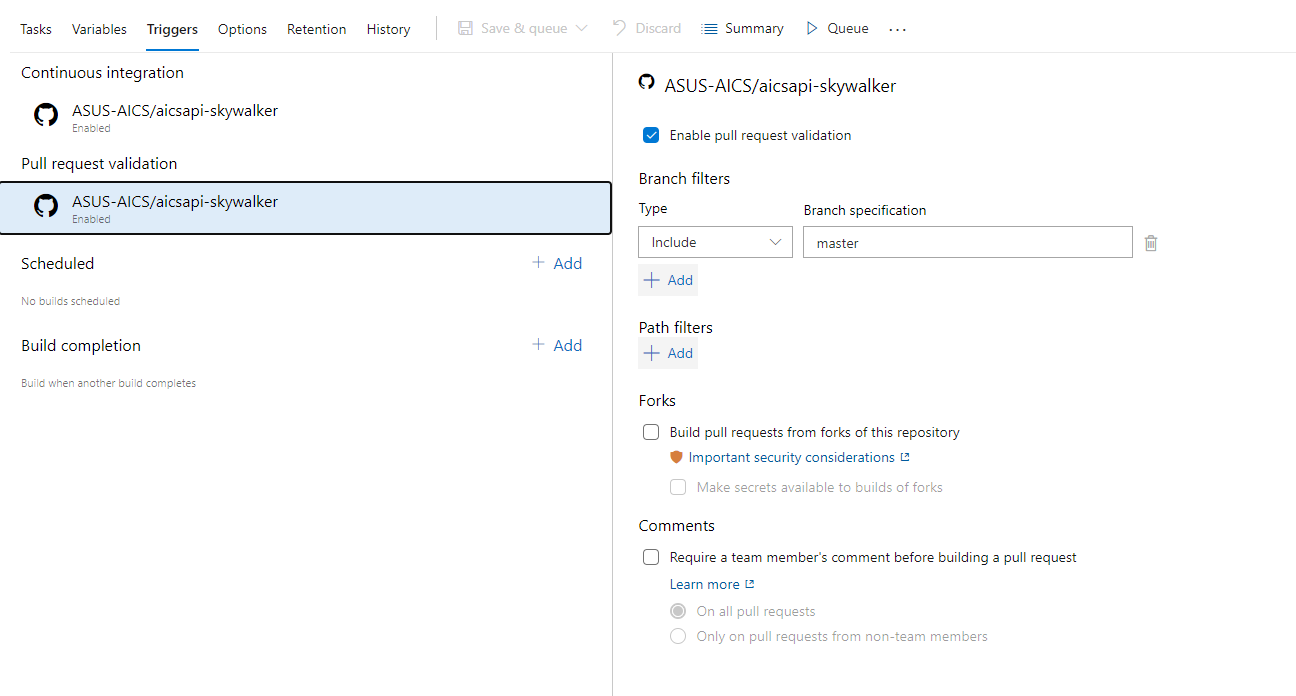
You may enable pull request validation or continutes integation in “Triggers” tab

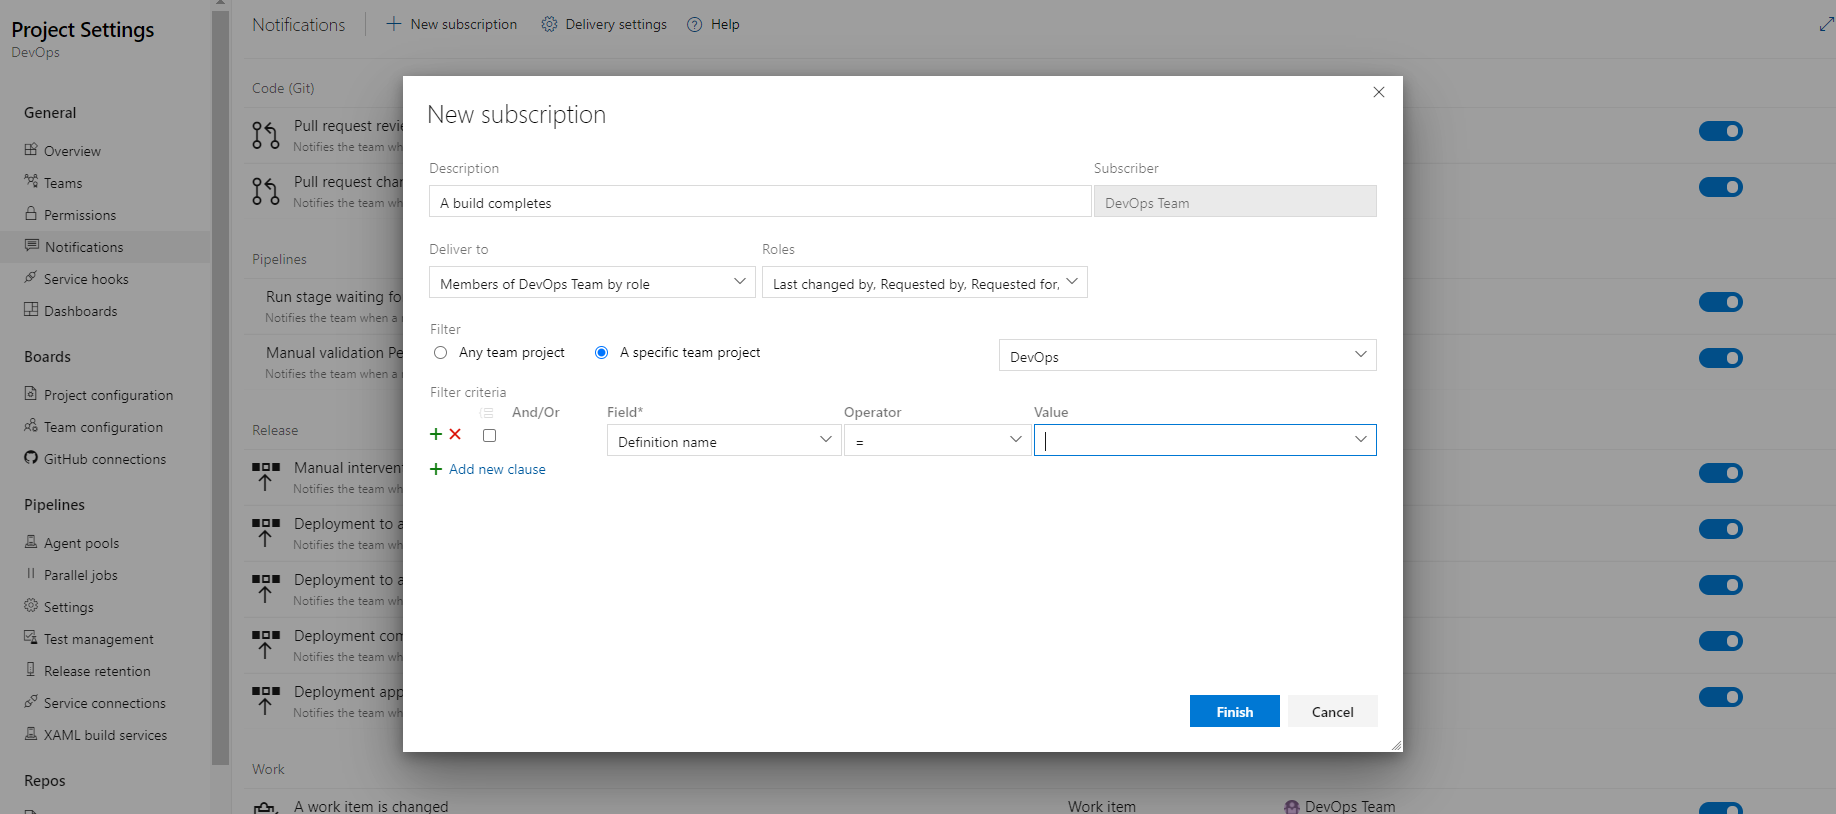
Configuring Build Notifications
Go to “Project Settings” and Click “Notifications”.
Click “New subscription” and create build completes/fails notification, so your team or the receiver you set will receive email notification once the pipeline build completes/fails